Monday 31 December 2012

Children's Christmas Cards

Cards for Daddy (clockwise from top left) - tree, front door, baubles, fireplace.
I thought I'd share the little cards that were made by Zoe, Lily and Eli for Tim (Jed preferred to keep his blank!).  It is activities like these that are so valuable for many reasons; thinking about the person for whom it is being made, working together to share ideas and resources (i.e. "No, you can't have all the red buttons!"), feelings of pride, accomplishment and satisfaction upon completion, helping one another, cleaning up afterwards, marveling at all the buttons in Mamma's button tin, the anticipation of how excited Daddy will be when he sees the cards - I could go on and on!

I gave myself a pat on the back for allowing my children to use runny glue and the responsibility of having the button tin at their disposal (these things are of great significance during a hectic, extremely busy, Christmas-is-at-our-house-twice-so-there-is-lots-to-do time of year!).

Overworked

My sewing machine is being serviced at the moment. Right before Christmas (just after I finished up all the Christmas gifts) she started doing some funny things; skipping stitches, not taking up the bobbin thread after threading and a few other oddities that are not usual for her. Despite giving her a bit of a de-fluff and a quick clean inside, she was still behaving strangely. So, off she went to the kind man who makes her better!
Still looking good after all these years. Just a shame it doesn't actually work any more!
No machine means no sewing  I could have tackled some of the mending that needs hand sewing, but let's not mention that!), so I thought I would take the opportunity to cut out my swap blocks for the month of January, as well as some of the Bee blocks for upcoming months (I thought it would be a good idea to get ahead for these where possible!). Just as I finished the last block my faithful rotary cutter called it quits. The blade keeps popping back in to its safety guard when I attempt to cut fabric. I have had this rotary cutter for...a long time! It is my original and only cutter and must be at least 12 years old. So while it served me well I am now not able to sew or cut out any more quilt blocks!

Messenger bag pieces cut out. Just need my machine back to put this together!
Undefeated I decided to cut out some messenger bags for the boys, as I can do this competently with my (new - thank you Santa!) scissors. I am using the tutorial from Zaaberry and hope mine turn out looking just as cute (well, maybe not cute for Jed's bag. Perhaps 'cool' would be a more appropriate word to use for a nearly eleven year old!)!

I took a trip to Spotlight this morning to purchase another rotary cutter (I was hoping for one exactly the same as my previous one, as it has been such a joy to use all these years), only to return empty handed (okay, not empty handed, but without another rotary cutter!). Spotlight had a very disapointing selection of rotary cutters and the one I longed for was not among them. But, do not be concerned, I found one on ebay and it is being shipped from the US for a total cost of $16. Yes, sixteen dollars including shipping! I tried to shop locally and then online in Australia, but I wasn't prepared to pay three times the amount for the same product. Coming from the US does mean that I'll likely be using my scissors for the next few weeks, but I'm okay with that (because it was only $16!!)!

Now, while I have your attention, I tend not to get too fixated on New Years Resolutions (I prefer to have ongoing whenever-I-need-to-modify-things resolutions throughout the year!). This year, however, I have decided not to buy any fabric during 2013. It is going to be difficult, but I can do it. I can. I can. I can. Will just have to enter every quilting fabric giveaway on the web instead.....

Thursday 27 December 2012

Recent Finish


My MIL's Christmas gift!

Early in the year I made a quilt for a dear friend's birthday. As the quilt was progressing (i.e. as it was laid out on the floor!) my MIL visited and commented on how much she liked it. Her comments were so complimentary and enthusiastic that I decided right then to make another one to give to her at Christmas time. Despite deciding on this quilt such a long time ago, I found myself hand stitching the binding to the back on Christmas Eve! As a result, I didn't take any photos before wrapping it up, but took these two shots on Christmas Day (those are my MIL's hands holding it up). I felt the need to politely explain that the only reason I was asking her to hold the quilt up in front of her face was so that I could get a picture of the entire quilt for the blog!


I didn't have enough of the backing fabric I used in the original quilt, so decided to use some of the leftover fabric from the front to make a pieced backing. I love it! I think it looks great, plus I enjoy the feeling of using up the leftover bits (LOVE that feeling!).

My MIL was both surprised and thrilled to receive this quilt. She remembered the original quilt without any prompting from me and expressed her appreciation at the time taken to make one for her. I couldn't have been happier!

Monday 24 December 2012

Plump Partridges

Plump Partridges hanging in the lemon tree (we do have some pear trees but they are small the partridges chests would be scraping the ground. Perhaps next year!)!
I have made about 25 of Modest Maven's Plump Partridges in a variety of fabric combinations! While everything worthwhile doing takes time, these are quick for such a cute looking ornament.


I chose non traditional Christmas colours for all my partridges so that they can be displayed all year round. They look so pretty sitting on a shelf or hanging from a doorknob.

I have three more to make before Christmas Day and then the rest can go in the box I recently purchased for finished projects for next year! I like the idea of having a box full of lovely hand made items. Let's see if I can fill it by, say, August? 

So, what's your favourite colour combo? Are you a traditional fabric partridge or a more contemporary fabric partridge?


Monday 17 December 2012

A Kiss

This bag just looks like it is empty.
This morning was a little...turbulent. It is the second last day of school and also school concert day. Some teacher gifts are still in progress and children have been waking up at 5:30am each morning. Zoe has a tooth that should have fallen out days ago and Lily has a sore cheek. There was no bread for lunches and a funny smell coming from the crystal beads (little balls that swell up when water is added to them - they have now been disposed of!). There was a lot going on this morning and there was some grumpiness as a result!

When Eli insisted on taking his little 'I love Ollie' bag in the car to drop off older children at school I was more than happy for it to come with us. It was empty, but as long as Eli compliantly got in the car and allowed me to buckle him in I didn't mind if he wanted to wear a pair of undies on his head!

After dropping off the older three at school (and reassuring Zoe that I would bring her (left at home) white concert t-shirt later in the day and before the first performance) Eli and I proceeded to run some errands. As we were chatting I learned that the bag wasn't empty. Eli had put Daddy's kiss in it. So I cried a little, gave him a cuddle and thanked God for moments such as these.

Sunday 16 December 2012

Teacher Gift: Apple Jug Rug

Zoe's jug rug straight out of the washing machine!
Zoe made this 'jug rug' for her teacher! Zoe's teacher always has a jug of cold water on her desk. Apparently the condensation on the outside of the jug results in a little puddle on the desk around the bottom of the jug. Zoe thought that a 'jug rug' would be useful. An apple block was chosen because, well, traditionally that's what students give their teacher! I thought it was a fabulous idea.

I helped by paper piecing the apple and Zoe did the rest. As the apple used a red fabric, we washed the jug rug with a few colour catcher sheets (available from the supermarket in the laundry product aisle). Not a run in sight (though the colour catcher sheets were red when they were removed from the washing machine!)! I love it when products do what they are supposed to!

Teacher Gift - Snowmen

We made these snowmen after seeing similar ones on Pinterest. We used black felt for the hat (hot glued on to the lid), eyes and buttons.

After accidentally gluing a piece of felt to my thumb I switched to paint pens for the nose and mouth! The mini marshmallows in the top jars (which are spice jars purchased at Kmart) should all be white, but I didn't pay enough attention to them when I was buying them, so ours are rainbow coloured! I used Cadbury Drinking Chocolate in the middle jars (a 400g container was enough to make four snowmen with enough left over for a couple of hot chocolates - yay!) and would recommend using a large funnel to fill the jars. The bottom jars contain wrapped Christmas mints - I recently found some at Red Dot (1kg for $5). I think mini candy canes would be lovely too.

The scarves are made from some scrap fleece that I had. Cut some strips and fringe the ends (or not!).
Edit: The scrap fleece scarves were way too short. I swapped them for some wire edged Christmas ribbon - with snowmen on - bought at Spotlight for $1.50.

One little tip - wash your jars out before you glue them together. Not after you glue them together like I did! Glue the jars together with super glue. A friend kindly started her snowmen before us and let us know that the hot glue gun just doesn't cut it.

These four gentlemen are off to school tomorrow!

Teacher Gift: Flowers In A Pot

Another teacher gift inspired by someone else's creation on Pinterest! These black glazed pots (complete with saucer attached to the bottom of the pot) were bought at Bunnings for $2.51 (not sure why it wasn't rounded to the nearest 50 cents, but at that price I wouldn't even consider questioning it!). The potted colour was $2 and happened to fit perfectly inside the pot.

I used Posca paint pens for the 'tape measure' and writing.

This is a fantastic gift in my view - a lovely thank you message, cost effective and, provided you have paint pens, really quick and easy to put together. Older children could put these together by themselves. I applied the paint work for Eli, though he was with me all the way from purchasing the pots and plants (pushing them around in his miniature Bunnings trolley - it must have had a dodgy wheel as it kept pulling to the left!) to putting the flowers in and watering them. Ticks all the boxes for me!

Little Eli took great delight in presenting each of his teachers at church with one of these. I am pleased to say that they were well received!


Saturday 15 December 2012

Voting for the Christmas Quilts

Voting for the Christmas quilts is now up and running on Quilting Gallery. I always enjoy looking at other people's creations - I'm sure you will too! My quilt is about the 33rd quilt down the page.  I LOVE the quilt after mine (as well as quite a few more!) - it's a good thing you can vote for up to six quilts! Click Here to vote!

Friday 14 December 2012

What do you think about a giveaway?

Plump Partridge - tutorial from Modest Maven
I know my little blog is very new, but I've been thinking about hosting a little giveaway. The thing is, I need a reason and something to give away!

Any suggestions for a reason? Perhaps once I get to 50 posts?

What do you think I should give away? A plump partridge (tutorial from Modest Maven) that I have been busy sewing for teacher gifts? A fat quarter or two of fabric?

I welcome your thoughts!

Janet's Ohio Star


Janet and I swapped Ohio Star blocks this month! This is the block I am sending to Janet (she requested pink and purple). Below is the lovely block Janet made for me. I love the way the star points float on the blue and white floral.

Janet's photo of my lovely block!

Sheep's Legs


Nativity ornament

I love Christmas. I love reading the Christmas story and celebrating when Jesus was born. For me, the spirit of Christmas is the spirit of Christ. It is because of this that I love the Nativity. My mother in law gave Tim and I a beautiful nativity Christmas ornament the year of our first Christmas after being married. The photo is quite poor - the ornament is a muted, 'old world' gold and displays the nativity three dimensionally all the way around it. It is one of my favourite ornaments.

I have a few nativity sets. I learned the hard way that anything on display in a home with young children needs to be able to be touched and played with (read that as 'I have a broken nativity set because I told my children not to touch it believing they wouldn't touch it!')! Here are some of the nativity sets that my children love to play with.

Block Nativity


Soft Nativity sewn from a purchased panel and stuffed.
Purchased Felt Nativity - all in one piece (i.e. attached to the creche!).

Purchased Felt Nativity - moveable figures. I love that the creche stores the figures when it is time to pack it away!

Now, I do have a few little (and I do mean little - no taller than 5cm!) Nativity sets. I figure that if they get broken, they get broken while they are being loved!

No sooner had I put the breakable little Nativity sets on display this year than Eli began using them in some lovely imaginative play. It was delightful to watch. Later in the day I was vacuuming near the Nativity and went to rearrange the figures.
I noticed that the sheep (missing from this photo) looked a little different. It was missing three legs! I recalled hearing a noise during Eli's imaginative play that in hindsight was a sheep bouncing on the tiled floor. My heart sank, as I realized that the legs were now most likely in the vacuum cleaner! I looked around on the floor where the Nativity was sitting in the vain hope that I would find three 4mm long white legs. I didn't. I then considered snapping off the third leg and just having the sheep sit on its belly as though its legs were tucked underneath (the cow is doing it, why not the sheep?). Surely snapping off the leg was better than rummaging around in the barrel of the vacuum cleaner? I had a look in the container of the vacuum cleaner and, to my delight, I saw a little leg (emphasis on the little!) without having to rummage around in the ...vacuum cleaner yuk. I picked it up, cleaned it and super glued it back on. It was only then that I realized I had added to my dilemma. A sheep with two legs was worse than a sheep with one. Now I needed two more legs or I would have to snap off the two it had.

Two legged sheep - the second leg is behind the visible front leg!
At this point Lily asked me what I was doing. A moment later she let out a shout. She had looked and found another leg! It was on the floor, right up against the skirting board (so I must be really good at vacuuming!).
Three legged sheep.
As delighted as I was at now having three legs (at least the sheep would be able to stand with three legs!), deep down I knew that the fourth leg was most likely in the vacuum cleaner container with all the other...yuk stuff. So, I donned my latex gloves and dove in. I was ready to give up when I saw something that made my heart sing. A dusty little leg. So the sheep is now whole again. And for those that like a moral to their stories? Don't be too hasty to snap off a sheep's leg!!!

Thursday 13 December 2012

Festivity Christmas Quilt


This is a quilt I made years ago using the paper piecing method. I remember that a website called Paper Panache offered a free pattern for the quilt which I promptly printed off. I didn't really have any idea how to paper piece, but quickly worked it out and enjoyed seeing the little blocks come together. While I love the nine centre blocks, my favourite part of the quilt is the border of Christmas lights that surround the nine blocks. I didn't buy any fabric for this quilt (no funds!), but used only what I had on hand at the time. I think this is why the quilt features blue quite prominently!


The wreath and the Christmas tree are embellished with Christmas buttons. The backing is a textured fabric that I remember was a real pain to sew with!

Backing fabric with chunky 'painted' stars!
I named this quilt 'Festivity' and have entered it into a little competition at Quilting Gallery. I wouldn't mind a bit if you voted for it!

Sunday 9 December 2012

Reindeer Noses

Ever wondered what reindeer noses tasted like? A friend shared this idea with me and I thought it would be a great gift for teachers. Although only three of my children go to primary school, they have nine teachers all up! Three are main classroom teachers and the others are either assistants or teach them part time (e.g. physical education).  These will be given on their own to teachers or with a more substantial gift. We just happened to have Maltesers and Jaffas in the cupboard so ten of these were put together in ten minutes.

Materials Needed For Each 'Reindeer Noses' Bag:

8 Maltesers
1 Jaffa
Self adhesive sticker (or creative alternative!)
Pen (for writing on the sticker!)
Cellophane bag (or zip lock bags)
Ribbon

Wednesday 5 December 2012

Christmas Cushion


Paper Pieced Wreaths designed by Kristy from Quiet Play
I have been participating in the Sew Seasonal Blog Hop hosted by Kristy from Quiet Play and Alyce from Blossom Heart Quilts.

When I saw this cushion from Janice at Better Off Thread I wanted to make one too! I had some great fabric that I thought would be perfect for the background and backing. While I adore traditional Christmas colours, I love non traditional colours just as much!
Look at that sweet book!
 I swapped the Santa hats for wreaths and chose a white background so that the wreaths wouldn't get 'lost'.

 Some Vintage Modern jelly roll strips were perfect for the wreath borders and the binding.

The back of the quilted cushion front.

 I am quite proud of my free motion quilting! Thanks Janice for your inspiration.
The back of the cushion cover. I love this fabric!

The finished cushion
 So our couch has its first cushion! Very timely, as we also put up our Christmas tree today(after a mice 'ate' our old one!)!


Friday 30 November 2012

Christmas Table Topper

I have never made a table runner. I have admired many but have never actually made one myself. Why? Because we have a square table. The whole 'runner' concept down the middle of the table just seems a bit funny to me when applied to a square. Unless you make a square table runner of course - or table topper as I prefer to call it in this case. Until now I hadn't been inspired to conjure up a square topper.

When I decided to participate in the Sew Seasonal Blog Hop hosted by Kristy and Alyce I was determined to finally make the two items that I just hadn't done yet - a table topper and a cushion cover. That's right - I haven't made a quilted cushion cover before either (because cushion covers that are made to take for naptime when children start kindy don't count!). More on the cushion cover later.

I had been saving a couple of Kate Spain's Joy charm packs for some months. When I saw Alyce's Ornamental block patterns I knew immediately that this was the project for my much loved Kate Spain fabric. Alyce's patterns also lent themselves to being arranged in a square pattern, as the 'ornaments' were non-directional. And so I began.


I will admit to having quite a few late nights as a result of working on this only when children were all in bed asleep (as lovely as quilts and crafting projects are, they still come second to my family!). That's why the photos are never great - it couldn't be my lack of photographic skills!


The back of the quilt, flapping in the breeze while hanging on the line!


And this is the end result. I am really pleased with it and look forward to popping it in the centre of our table. I kept the quilting simple, as I wanted to showcase the ornaments around the edge without distraction. I also chose a tone on tone white for the background with the aim of having the ornaments 'float' around the edge. The idea is to place the Christmas ham (or bbq offerings!) in the centre space of the table topper (all my serving plates are square) framed by those delightfully festive ornaments. I love it!

Saturday 24 November 2012

Scribble Initial Shirt

I recently came across this Scribble Initial T-Shirt Tutorial and thought it would make a great after school activity. Not because we aren't busy enough, but with the end of the school year getting closer I find that everyone is just a little worn out. A quick activity that produces a feeling of satisfaction and pride does wonders to help everyone to be patient and tolerant with one another. As does a swim in the pool after the school day!

I already had a few plain white t-shirts in the cupboard ready to be tie dyed, so I re-purposed them with a note to myself to replace them later! I followed the tutorial from Aesthetic Nest, replacing the freezer paper with contact (I didn't have any freezer paper and always feel good when I use what I have, rather than buying something specifically for a project!).

After some collaboration with the children we decided to use Cooper Black in 700 for the older children and 600 for Eli's smaller sized shirt.


We traced the letters on to Contact, cut them out, peeled off the back and stuck the outline or 'frame' of the letter on to the shirt. A piece of cardboard was placed inside the shirt so that the artwork did not seep through to the back. Then it was scribble time! Eli was delighted and scribbled away. Zoe decided to scribble in a very orderly fashion, while Lily (not pictured) coloured in block sections. We used Crayola fabric textas which worked fine, though any scribbling done with great excitement did have a tendency to move the t-shirt fabric around (the thicker the fabric the better). Gentle scribbling would be my recommendation! We did four shirts and the textas seem like they would be good for at least another round.

After heat setting the initials with the iron (and then letting each child wear their shirt until it was time for bed) I tossed them in the washing machine with a load of whites putting my full trust in Crayola and their assurance that the colours would not run. Guess what? The colours did not run. Phew!


This is a great activity that is quick, looks great, is cost effective (t-shirts for us ranged from $4 to $8. We already had the Crayola fabric textas, though I'd like some more! When the next person asks me what one of my children might like for their birthday I'm going to suggest them!) and my kids loved it. I loved it because it was no mess, no stress, can be prepared in advance and whipped out in 'times of need', took care of everyone from the ages of 2 to 10 years old, and we also have another great gift idea for others!

Zoe's interpretation of scribbling. It reminds me of fireworks!


Wednesday 21 November 2012

Beauty from Isa

Look at the stunning block that Isa made for me this month for Quilt Block Swaps Australia. I LOVE it!! At this time of the year it particularly reminds me of the Christmas star. My request from each of my monthly swap buddies is any star in blues and white. I am hoping for a quilt top with lots of variety - this block certainly fits in with my vision.

This was Isa's first block sewn using the paper piecing method - sewing pieces of fabric to a paper foundation following a numerical sequence. The paper is then torn away when the block is complete. This block is sewn beautifully. Isa also sent a tea towel (wouldn't you know - I am in the process of replacing all my tea towels - perfect timing) and a beautiful card.

Thank you Isa!

Monday 19 November 2012

'Pretty' Charm Pack Giveaway

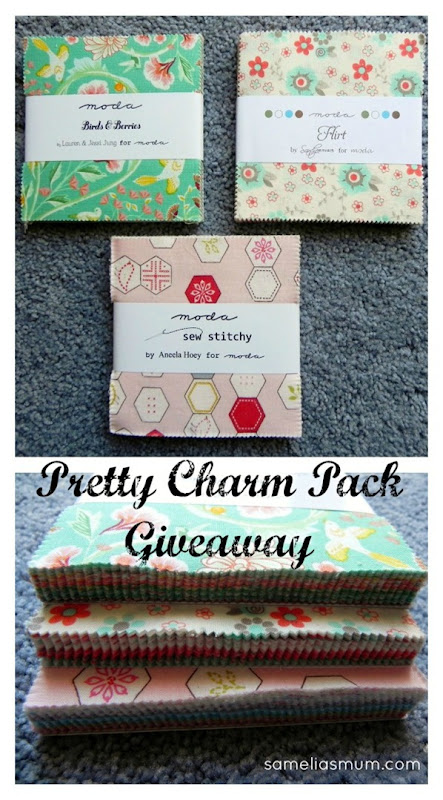
Pretty Charm Pack Giveaway sameliasmum

 Hey! Head on over to Samelia's Mum where Anorina is giving away these very pretty charm packs. All you need to do is leave a comment. While you're there, have a browse - Anorina has some great ideas!


Wednesday 14 November 2012

Bon Bon Bag

 Zoe chose the bon bon block for her Christmas bag.
Kristy's patterns are great to work with. They come together quickly and look fabulous. When I sew the various sections of each block I simply finger press as I go along and then iron before putting the sections together. It couldn't be more simple!
I love the non traditional colours of Zoe's Christmas bag.

Sew Seasonal Blog Hop
Related Posts Plugin for WordPress, Blogger...