Friday, 30 November 2012

Christmas Table Topper

I have never made a table runner. I have admired many but have never actually made one myself. Why? Because we have a square table. The whole 'runner' concept down the middle of the table just seems a bit funny to me when applied to a square. Unless you make a square table runner of course - or table topper as I prefer to call it in this case. Until now I hadn't been inspired to conjure up a square topper.

When I decided to participate in the Sew Seasonal Blog Hop hosted by Kristy and Alyce I was determined to finally make the two items that I just hadn't done yet - a table topper and a cushion cover. That's right - I haven't made a quilted cushion cover before either (because cushion covers that are made to take for naptime when children start kindy don't count!). More on the cushion cover later.

I had been saving a couple of Kate Spain's Joy charm packs for some months. When I saw Alyce's Ornamental block patterns I knew immediately that this was the project for my much loved Kate Spain fabric. Alyce's patterns also lent themselves to being arranged in a square pattern, as the 'ornaments' were non-directional. And so I began.


I will admit to having quite a few late nights as a result of working on this only when children were all in bed asleep (as lovely as quilts and crafting projects are, they still come second to my family!). That's why the photos are never great - it couldn't be my lack of photographic skills!


The back of the quilt, flapping in the breeze while hanging on the line!


And this is the end result. I am really pleased with it and look forward to popping it in the centre of our table. I kept the quilting simple, as I wanted to showcase the ornaments around the edge without distraction. I also chose a tone on tone white for the background with the aim of having the ornaments 'float' around the edge. The idea is to place the Christmas ham (or bbq offerings!) in the centre space of the table topper (all my serving plates are square) framed by those delightfully festive ornaments. I love it!

Saturday, 24 November 2012

Scribble Initial Shirt

I recently came across this Scribble Initial T-Shirt Tutorial and thought it would make a great after school activity. Not because we aren't busy enough, but with the end of the school year getting closer I find that everyone is just a little worn out. A quick activity that produces a feeling of satisfaction and pride does wonders to help everyone to be patient and tolerant with one another. As does a swim in the pool after the school day!

I already had a few plain white t-shirts in the cupboard ready to be tie dyed, so I re-purposed them with a note to myself to replace them later! I followed the tutorial from Aesthetic Nest, replacing the freezer paper with contact (I didn't have any freezer paper and always feel good when I use what I have, rather than buying something specifically for a project!).

After some collaboration with the children we decided to use Cooper Black in 700 for the older children and 600 for Eli's smaller sized shirt.


We traced the letters on to Contact, cut them out, peeled off the back and stuck the outline or 'frame' of the letter on to the shirt. A piece of cardboard was placed inside the shirt so that the artwork did not seep through to the back. Then it was scribble time! Eli was delighted and scribbled away. Zoe decided to scribble in a very orderly fashion, while Lily (not pictured) coloured in block sections. We used Crayola fabric textas which worked fine, though any scribbling done with great excitement did have a tendency to move the t-shirt fabric around (the thicker the fabric the better). Gentle scribbling would be my recommendation! We did four shirts and the textas seem like they would be good for at least another round.

After heat setting the initials with the iron (and then letting each child wear their shirt until it was time for bed) I tossed them in the washing machine with a load of whites putting my full trust in Crayola and their assurance that the colours would not run. Guess what? The colours did not run. Phew!


This is a great activity that is quick, looks great, is cost effective (t-shirts for us ranged from $4 to $8. We already had the Crayola fabric textas, though I'd like some more! When the next person asks me what one of my children might like for their birthday I'm going to suggest them!) and my kids loved it. I loved it because it was no mess, no stress, can be prepared in advance and whipped out in 'times of need', took care of everyone from the ages of 2 to 10 years old, and we also have another great gift idea for others!

Zoe's interpretation of scribbling. It reminds me of fireworks!


Wednesday, 21 November 2012

Beauty from Isa

Look at the stunning block that Isa made for me this month for Quilt Block Swaps Australia. I LOVE it!! At this time of the year it particularly reminds me of the Christmas star. My request from each of my monthly swap buddies is any star in blues and white. I am hoping for a quilt top with lots of variety - this block certainly fits in with my vision.

This was Isa's first block sewn using the paper piecing method - sewing pieces of fabric to a paper foundation following a numerical sequence. The paper is then torn away when the block is complete. This block is sewn beautifully. Isa also sent a tea towel (wouldn't you know - I am in the process of replacing all my tea towels - perfect timing) and a beautiful card.

Thank you Isa!

Monday, 19 November 2012

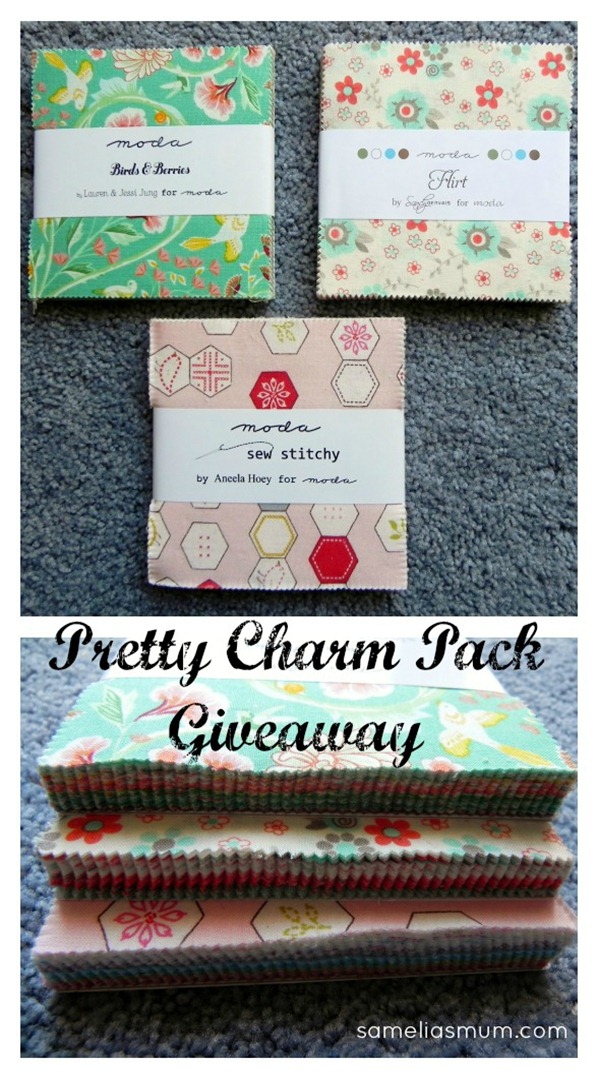
'Pretty' Charm Pack Giveaway

Pretty Charm Pack Giveaway sameliasmum

 Hey! Head on over to Samelia's Mum where Anorina is giving away these very pretty charm packs. All you need to do is leave a comment. While you're there, have a browse - Anorina has some great ideas!


Wednesday, 14 November 2012

Bon Bon Bag

 Zoe chose the bon bon block for her Christmas bag.
Kristy's patterns are great to work with. They come together quickly and look fabulous. When I sew the various sections of each block I simply finger press as I go along and then iron before putting the sections together. It couldn't be more simple!
I love the non traditional colours of Zoe's Christmas bag.

Sew Seasonal Blog Hop

Sunday, 11 November 2012

Minnie the Travelling Stash

 Have you ever heard of a Travelling Stash?
Meet Minnie. She is a fat quarter (50cm x 55cm) travelling stash who weighs a little under 3kg so she fits in an Australia Post satchel!). Minnie is making her way around Australia (I think she is currently in Queensland before moving on to NSW). At each stop she changes just a little as fat quarters are taken out and replaced by others (kind of like having an opportunity to shop for fabric at home!). When she has visited everyone on the list she will come back home to me. I am looking forward to seeing how much she has changed (though it will be quite some time before I see her again!).

If you are interested in joining a travelling stash you can join the Facebook Group here. Unfortunately it is only for Australian residents, though I am sure that groups such as this can be found in a lot of other countries.

Candy Cane Bag


I know I wasn't going to undertake any more projects until Zoe's quilt was finished, but I thought I'd sneak this one in anyway! Using a paper pieced candy cane block from Kristy at Quiet Play, I designed a cute Christmas bag for my Lily. She loves it and it accompanied her to church today. The bag itself is a simple design that can be put together quickly. The bag front can be as simple or as
intricate as you like. I showed Lily all of the blocks that Kristy was offering as part of the Sew Seasonal Blog Hop and asked her to select one. She chose the candy cane (I was not surprised - even though Lily LOVES her fruit and veg, every child loves lollies!). So a candy cane bag it was to be!

The sparkly trim was particularly well received! Of course, I had Zoe choose a block as well.  She chose the bon bon/Christmas cracker because "it looks like a big lolly". I do provide my children with healthy food. Really.

Stay tuned for Zoe's bag! 

Sew Seasonal Blog Hop


Related Posts Plugin for WordPress, Blogger...