I love scrappy quilts, so I finally settled on the scrap jar star block by Amber who blogs at Gigi's Thimble.
Here is my version of the block; I decided to resize it to use 2.5" squares in the centre 16-patch. I also changed the making of the half square triangles to a method that I prefer (because it makes two and doesn't require any sewing on the stretchy bias of the fabric).
Scrap Jar Star
This block measures 16.5" x 16.5" unfinished.
Fabric Requirements
White fabric
8 @ 4 7/8" x 4 7/8" squares
12 @ 2.5" x 2.5" squares
4 @ 2.5" x 4.5" rectangles
Bright scraps
12 @ 2.5" x 2.5" squares
8 @ 4 7/8" x 4 7/8" squares (for 8 different star points) OR
4 @ 4 7/8" x 4 7/8" squares (for star points with repeated fabrics)
4 @ 4 7/8" x 4 7/8" squares (for star points with repeated fabrics)
Construction
Making the centre 16-patch:
1. Sew a 2.5" x 2.5" white square to a 2.5" x 2.5" scrap square. Do this another 7 times for a total of 8 pairs. Press seam open towards the scrap square.
2. Sew two pairs of white/scrap squares together. Do this another 3 times for a total of 4 strip sets.
3. Lay out the strip sets in four rows so that the white and scrap squares alternate.
4. Sew strip sets together. Press these seams open. Set aside.
Making the star points:
1. Draw a diagonal line from corner to corner on the back of each of the 4 7/8" x 4 7/8" squares.
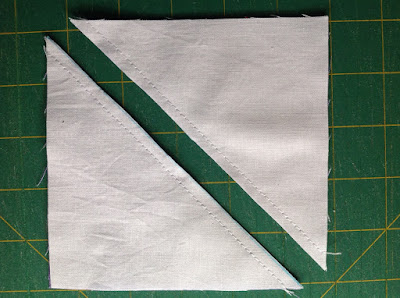
2. Place a white 4 7/8" x 4 7/8" square and a 4 7/8" x 4 7/8" scrap square right sides together. Sew 1/4" either side of the diagonal line. Cut along the diagonal line. Do this another 7 times (or 3 if you are using 4 different fabrics) for a total of 8 half square triangles (HST's).
3. Press the seam towards the scrap fabric. Trim the little white 'ears'. ***Put aside one of the HST's
from each pair if you have chosen the 8 square option so that the star points are each a different fabric (you could use these to make two scrap jar star blocks at the same time!).
4. Sew two different HST's together. Press seam open. Do this another 3 times for a total of 4.
Making the corner blocks:
3. Sew a scrap 2.5" x 2.5" square to a white 2.5" x 2.5" square. Press seam towards the scrap square.
2. With the scrap square at the top, sew a white 2.5" x 4.5" rectangle to the left of scrap/white square unit. Repeat with another unit for a total of 2.
3. With the scrap square at the top, sew a white 2.5" x 4.5" rectangle to the right of scrap/white
square unit. Repeat with another unit for a total of 2.
Assembling the block:
1. Sew two of the sets of HST's to opposite sides of the 16-patch. Press seams towards the 16-patch.
2. Sew a corner block to each side of a set of HST's. Ensure that the scrap square is in the outer corner. Repeat for the remaining set of HST's.
3. Sew a HST and corner block set to the top of the 16-patch. Repeat for the bottom of the 16-patch.
And you're finished!
Let me know if you make my version of the Scrap Jar Star block. I would love to see photos.
So, what are you working on at the moment? Something sewing related? A project at work? Something for your family? Or perhaps something for yourself!


